Showing posts with label Organization. Show all posts

Monday, 17 March 2014

Organizing Marks for Outcome Based Report Cards

If there is one thing I have learned from my short time as a teacher it is that you can never get too comfortable with what you are doing because someone is bound to come along and change it!

As I head into report card time again I find myself scrambling trying to figure out where I put my assessments and what marks to give my students. I am usually a very organized person and in my first year of teaching I spent a lot of time creating a marks book that worked for me. Then last year my district made the shift to outcomes based reporting which has resulted in a year and a half of me trying to find a new way to organize my marks book. Hence the scramble... it took a while to find one.

If you are not familiar with outcomes based reporting it is a method of reporting where teachers mark and report on specific outcomes which come from the Program of Studies or States Standards document. I think it's great to be able to show parents exactly what has been learned, what topics/skills students understood well, and what topics/skills require more practice. The challenge comes in finding a way to organize my marks in a way that makes sense and ensures I have enough assessment for each of the report card outcomes.

After months of searching I think I have finally found a method that will work for me! It is so simple I cannot believe it took me this long to find it but now that I have I feel way more relaxed and organized.

Here is my breakthrough!
(Sorry about the horrible picture.. hopefully you can see enough of it that it makes sense.)

 I cannot take credit for this idea as I heard about it at our Teacher's Convention but still thought I would share it with you.
This is the marks book page I am using for our current unit on Measurement. It fills half a page and I print one for each student. In the left hand column are the outcomes that I will teach in the unit. Along the top of the page are the assessments I will use to determine students' marks. Of course I also leave room at the bottom to add any comments or observations I feel are necessary.

Sure it takes a little planning before hand to decide what I am going to take in for marks and what I am going to use to guide future teaching but the pay off, for me anyway, is totally worth it. The grey spaces show that the assessment in the top row does not connect to that specific outcome. I try to make sure each outcome has at least 2 assessments that I can use to report on student learning so that if a student has a bad day it doesn't effect their overall mark.

At the end of the unit I take any assessment pages I can (in this case it would be everything except their math journal pages) and attach it to the marks book sheet. That way I have everything together if a parent wants to see how I came up with the mark given on the report card.

It is definitely not rocket science and doesn't use any fancy technology but I find it helps keep me accountable with my marking - I tend to put it off a little too long - and keeps my student assessments organized and handy.

If you would like a copy of the template feel free to email me or leave a comment below and I will gladly share it with you!

Thursday, 14 November 2013

Activities Like... New Ideas... and Kind Hearted-Teachers


Hi all I am linking up late to the We Are Thankful Linky Party over at Blog Hoppin'. It has been a crazy couple of weeks and I have kind of ignored blogging so now I am trying to play catch up by doing a 3-in-1 post for this linky. I am Canadian so technically Thanksgiving has already passed for me but I loved the idea of sharing some ideas with the attitude of being thankful. I have learned so much from being connected to other bloggers and stealing borrowing ideas to use in my classroom and it has been wonderful! I am so thankful for all those who take the time to share their lessons, ideas, and wisdom by blogging. Thank you!

Activities like math centers get my students excited for math, keep them practicing basic skills, and allow me to teach in small groups using math rotations. This is my first year doing math centers and math rotations and my first attempt in September was not as smooth as I hoped. Since then I have taken a break, regrouped and set up some new centers.  I have been working hard over the last couple weeks to get my new math centers set up and organized. Finally they are ready to go and I am so excited! Now as we start our next math unit I can jump back into math rotations and differentiate my lessons. Hooray for being able to teach my students in small groups based on where they are at while the rest are kept focused and busy with math centers!!

All my centers activities fit neatly into one container and can simply be laid out during center time.


As I was putting my math centers together I was trying to figure out how to keep everything together with the little space, time, and money that I have. My centers in September were kept in basket containers but I found students had a difficult time knowing where everything went when they were putting things away. I have found a cheap and easy method for keeping centers small, compact, and easy to move from space to space.

Students take the plastic sleeve to their desk with their center packet and have all the materials they need.

My new idea for organization in the classroom is using plastic page protectors to keep everything together. We have been using these for our spelling program so students can keep all their spelling materials together in one spot. These plastic envelopes are great because they are durable, clear (which I find helps students keep their materials neat and tidy), and can be written on. In spelling my students are placed in different groups based on where they are at so I simply coloured the top corner of their plastic sleeve so they know what colour group they are in. It is such an easy way for me to pull out their stuff and know immediately what group they are in, what they have been working on, and where they need to go next.


The coloured blocks on the corner of the packet let me know what group the student is in.

I have also used these for all my new math centers which is great because all the centers materials fit in two baskets and take up way less room. Students simply grab the plastic sleeve for their center, take it to their working area and get to work. All the materials are kept in the plastic sleeve which is kept closed with a paperclip. I know they don't look that pretty and there are a lot of containers, plastic drawer stands, and other great ideas for centers however I have limited wall space in my room (lots of cupboards) so I like to keep things small and compact. Best of all they are inexpensive so if one of the plastic sleeves gets ruined I can simply replace it with a new one for about $0.15.

This center contains vocabulary cards, play money, a dry erase crayon and dry erase page to write on.
 Everything a student may need to complete the center.

Finally as my contribution to the Kind-Hearted Teachers part of this linky I am including some of my math center pages as a freebie. Many of my materials are from other teachers so I don't feel like I can share them but if you are looking for some great math center ideas please send me an email or leave a comment and I will gladly direct you to some of the places where I found my center ideas.


Thanks to Blog Hoppin' for this wonderful opportunity to link-up and share!

Thursday, 17 October 2013

Giving Math Rotations a Spin

This summer as I was surfing the many different teaching websites I stumbled across the idea of using math rotations over at 3rd Grade Thoughts. The more I read the more excited I became. Last year I found I had a difficult time differentiating my math instruction and had thought about trying to work in small groups but wasn't sure how to start. Stephanie's blog posts gave me an idea of how to get going.

After a month of introducing the concept to the students we have finally completed our first few weeks of full Math Rotations. Right now I'm trying to convince myself to stick with it. It is definitely going to take some getting used to. I have learned that I am still developing the habits and pre-planning necessary to make these rotations work. On the plus side though the students love it. They are always more excited when they see Math Rotations on the schedule instead of plain old Math class. It  has not gone as smoothly as I hoped but I am learning first attempts seldom do so I am going to share with you some of my thoughts, reflections and plans for moving ahead to try and make this system work for me and my students.

First of all I have to say that I am loving the chance to work with smaller groups of students. I feel I have a much better grasp of where students are at and how I can help them which is great. One thing I need to work on though is ensuring my high group is feeling challenged in their learning and my lower groups are able to complete the practice sheets provided by the curriculum. I am still trying to decide how I am going to deal with this. I find it is a common issue to have in math - one group finishes the required work in 10 minutes and another group needs 40 minutes to do the same sheet. I might try giving the lower group fewer required questions (they need to finish part a and b of each question) to complete and see if that works. If they finish the required amount early they can try to complete the rest of the questions. As for the higher group I am hoping to gather a collection of challenge sheets that will push them beyond our current curriculum to ensure they don't get bored. Like I said... still working it all out.

The other aspect of this that is fairly new to me is the Math centers portion of it. In the last couple years I have spent more time putting literacy centers together and haven`t really gotten around to Math centers. Our curriculum has lots of hands on activities and games scattered throughout so I never really felt the need to use centers before however with Math Rotations centers are pretty much a necessity. For the first month I tried to have centers related directly to our unit of study however I found students seemed to be getting bored with them since it was a lot of the same thing over and over again. I think when I change them up I will try to have centers dealing with different math skills I think are important. That way they get extra practice as well as some exposure to concepts we will be covering later in the year. One thing I do know is I will be spending some a bunch of time figuring out new centers in the next couple weeks. How do you plan/organize your centers? I would love to get more ideas on how to keep it as simple as I can for myself. 3rd Grade Thoughts has some great ideas but I am always looking for more.

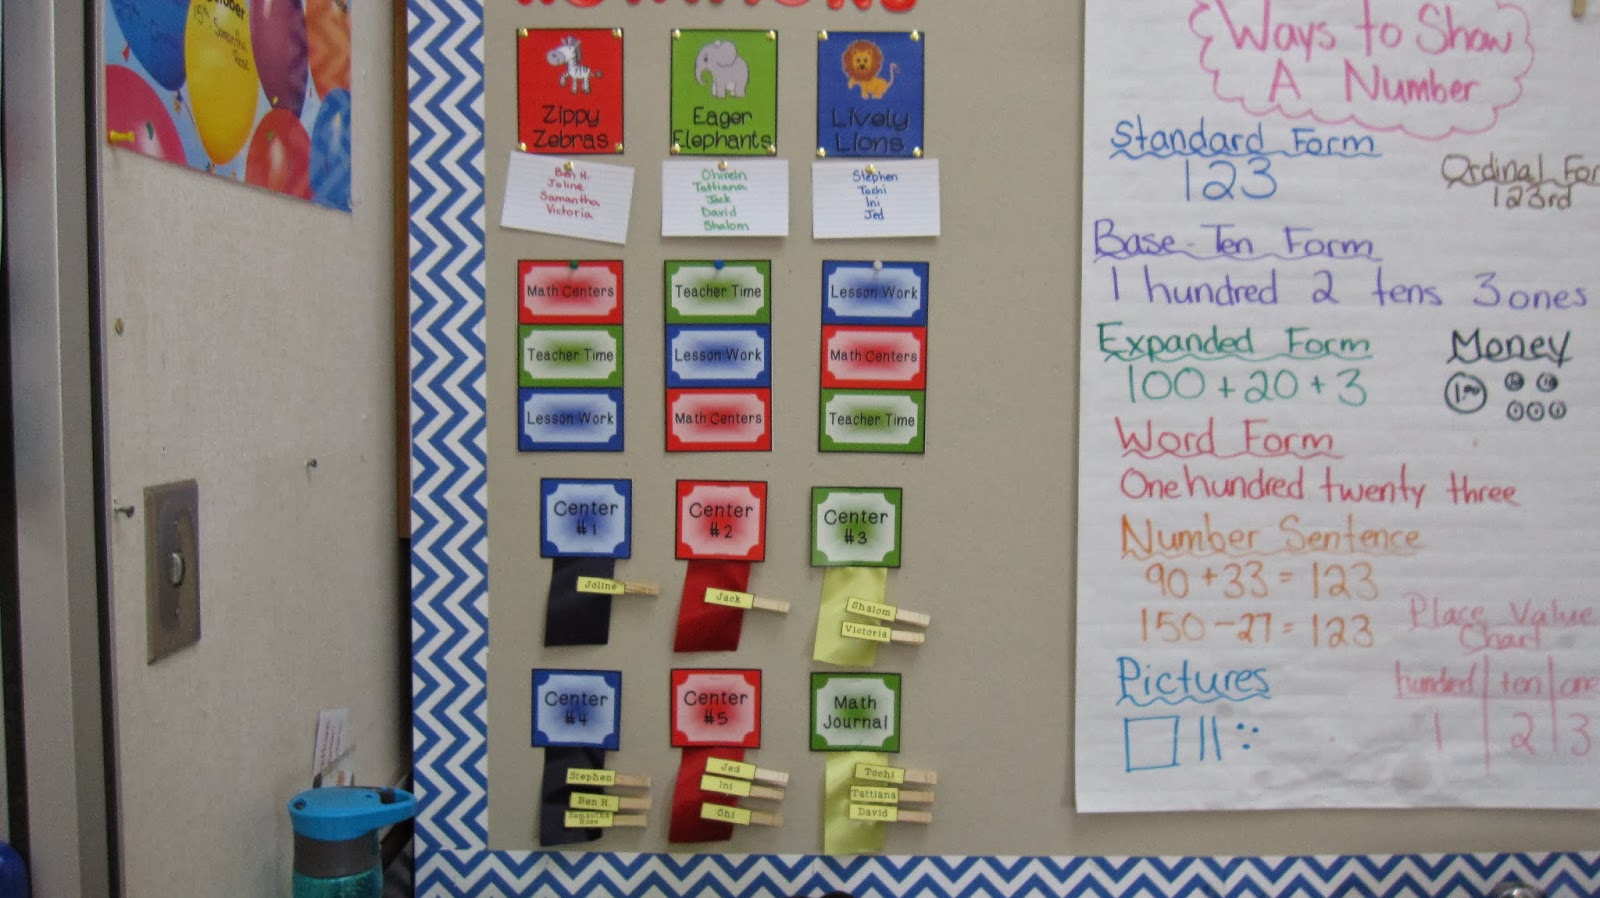
Finally I am re-evaluating how I have organized my centers. So far it has worked fairly well and the students always seem to know where they are supposed to be and what they are working on I'm just not sure I like how I move the kids through the centers. Right now I am using a checklist to keep track of what center
students have completed and am trying to constantly remind them to keep track of things in their Math journals. It's slightly chaotic and I feel there has to be an easier way. I think I may try putting together center packets and having students use their Math duo-tangs to move through the centers. I will still use the clips with their names and move them from center to center but my hope is if they have everything in advance they can be a little more independent and move through the centers themselves.

Wow... that was a long one. Basically my thoughts on Math Rotations are this:
1. They require a lot of pre-planning to ensure you have everything ready to go.
2. It takes work to keep it organized and to update the centers on a semi-regular basis.
3. They are totally worth it if you want a way to differentiate your instruction and keep students engaged in different math activities during class!


Friday, 27 September 2013

The Almost Organized Teacher: My Basic Organization Rules

One of my big goals for this year is to work on my organization skills. I am notorious for piling papers on various surfaces until I am no longer sure what still needs to be marked, what needs to be put away, what needs to be sent for printing, and what can be put in the recycle bin. This year I would like to improve on this and keep my desk and papers organized. In my few years of experience I have discovered what works and doesn't work for me and I would like to share a few basic rules I have discovered when it comes to staying organized and creating a system that works.

Organization Rule #1: Organization takes time and consistency.
No matter what system you may use to keep yourself organized it only works if you take the time to use it. For myself I am still trying to develop the habit of clearing off surfaces on a daily basis. In other words I need to take a few minutes every day and put everything away, whether it is supplies we used in Science, a homework assignment the students handed in today, or extra copies left over from the day's lessons. The big thing to remember is that moving clutter from a table to a teacher's desk doesn't count. This is a big thing for me to keep in mind as I am still working on defeating my tendency to simply pile stuff on my desk so I can ignore get to it later. So far I haven't managed to accomplish this completely every day and that is fine... creating new habits takes time. If I don't get to it every day I definitely make sure I take time on Friday afternoon to catch up and make sure everything is clear and ready to go for a new week.

This week was no exception. Here is a picture of my small group working table from Friday after school. Don't worry this pile wasn't there during the school day... I moved it off of my desk so I could get some work done.

 Before I left today I made sure to put everything back in its place and now both my desk and my small group table are ready for the students again on Monday. I am still working at making sure I devote the time and consistency needed to keep things organized but I can already see improvement from last year :)


Organization Rule #2: Put your spin on whatever system you decide to use.
I have spent a lot of time looking at other teacher's classrooms and marveling over their systems for staying organized. I'm the type of person who tends to find an idea and jump in with both feet before I really think things through. (Don't worry, I'm getting better at that too!) The result is I have tried a variety of different organization techniques in the past two years and they have all taught me one thing... just because it works for someone else doesn't mean it will work for me. Of course I encourage you to still look at what other teachers have done as there is no reason to re-invent the wheel and there are a lot of fantastic teachers out there who have been doing this a lot longer than I have. However you need to look at their systems and decide what parts of it may or may not work for you and make a system that works for you and your organizational needs. There is also some trial and error involved... at least that is the case for me.

Organization Rule #3: Be ready to change your system if needed.
As I said earlier, I have tried a few different systems for keeping myself organized. While I don't necessarily recommend changing your system completely, especially in the middle of the year (been there, done that, it doesn't work very well) you need to be ready to try different things if your system doesn't seem to be working. It takes a while to come up with a system for things that suits you and works within the demands of the job. Remember that you will get there! I'm pretty sure I have... I guess we'll have to wait and see.

In a future post I will go over some of the systems I am using for keeping myself organized this year. Don't expect them to be revolutionary, in fact most of them you will probably have seen before. Just in case you haven't though... stay tuned.

Monday, 2 September 2013

Classroom Tour

It's finally ready!! After spending a few days couple weeks organizing, cleaning, and setting up, my classroom is finally ready to go. Good thing too since the kiddos are coming tomorrow! Where did summer go? I am linking up Swimming Into Second to Show Off My Space. 

First the before pictures:


And now... Welcome to my home away from home! I am absolutely loving my classroom this year. I definitely put a little more time and effort into getting it just right but hopefully that means I won't be rearranging everything come Christmas break. 

Here is the view of the room from the door. It seems like hardly any teachers I have seen use rows any more but I like the idea of starting the year with the kids in their own space as they get comfortable with the routines and expectations.

Here is the view from the front of the room. Ignore the cart in the corner by the teacher desk/computers. I am temporarily storing it for a colleague.


Remember those bulletin boards I put up this year? Here they are with borders and titles just waiting for anchor charts, unit questions, and other exciting information! I am loving how much cleaner the space looks with all the shelving covered up!


 Under the bulletin boards are shelves which hold our book boxes, textbooks, math manipulatives and math centers. So happy with the containers from Dollar Tree which totally fit the colour scheme.


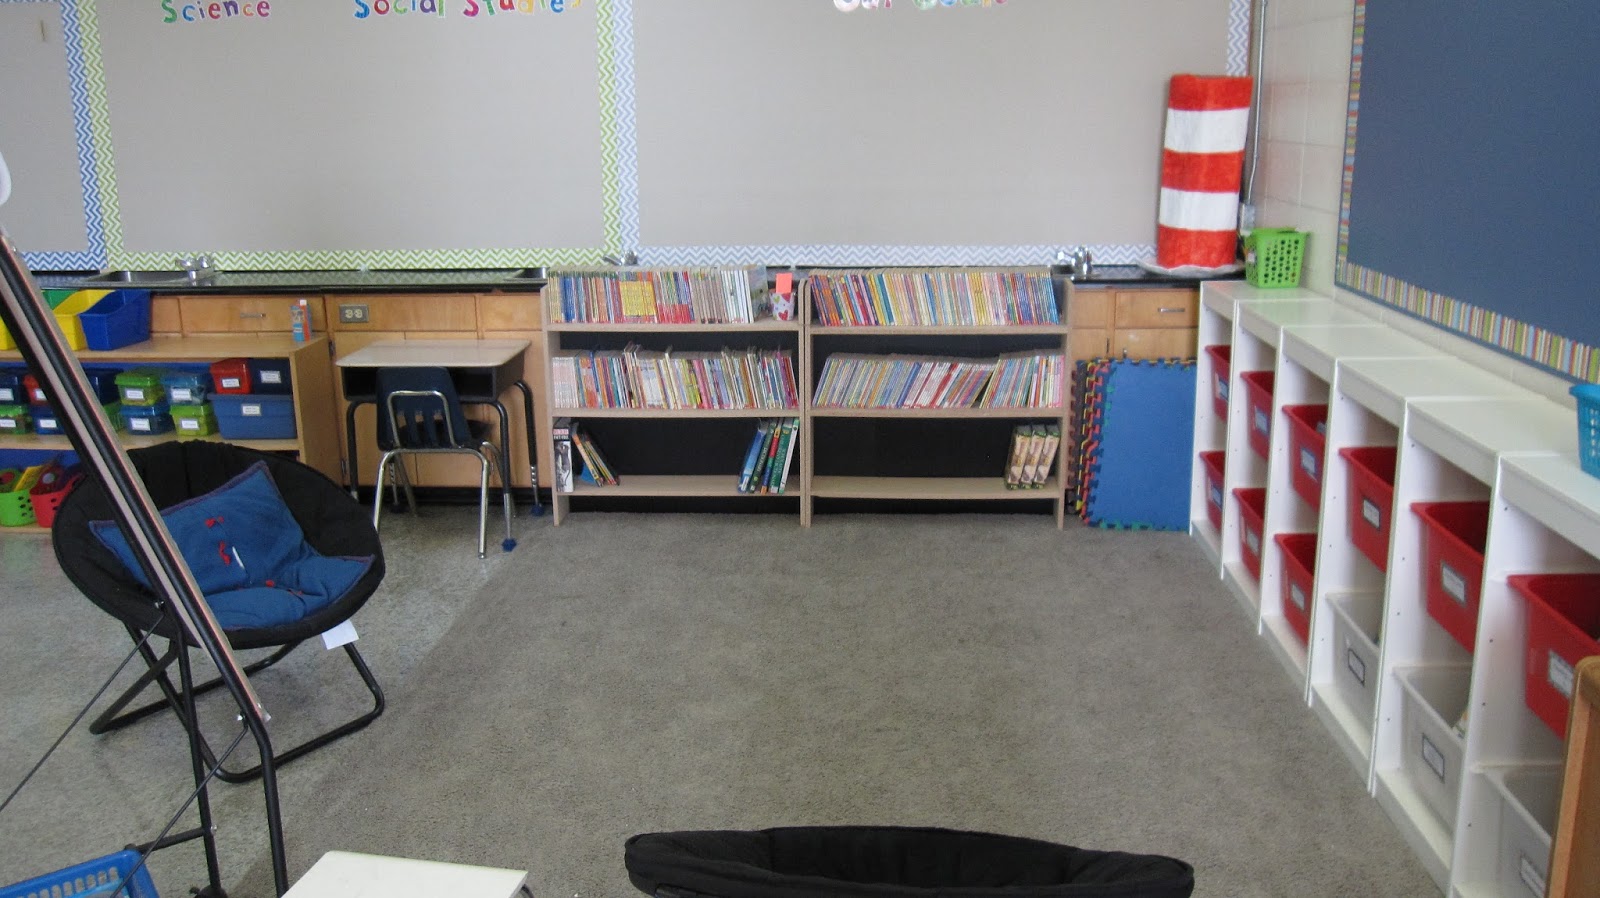
Continuing around the classroom we come to the library complete with my homemade Cat in the Hat hat and our CAFE board. The books are leveled according Fountas and Pinnell reading levels. The red bins are for fiction picture books and the white bins hold the non-fiction books.


Next to the library is the writing center with all our stationary supplies and our writing bulletin board.


Beside the writing center are our class computers and bookshelves used for teacher resources.


 Here is the view of the classroom from my desk. I pushed it up against the wall this year to try and eliminate as much "teacher" space as possible. It has completely opened the room up. You can just see the small group table in the bottom corner of the picture.


Along the other wall of the classroom are more cupboards and counter space. I am so thankful for all the storage in this room!


You may be wondering what is living in the giant aquarium. My classroom would no longer be complete without this little guy.


Finally we get to the front of the room. I don't have a Promethean board yet but I do have two huge whiteboards and a projector. Between the whiteboards is a small bulletin board which holds our calendar and some reminders for students about classroom signals and routines.


Beside the board are the mailboxes and job chart. 


 Thanks for visiting and checking out my finished space. I can't wait to share more classroom adventures with you as the year unfolds!